
Subtotal $0.00
In today’s digital landscape, having a strong online presence is crucial for businesses and individuals alike. Whether you’re building a personal blog, launching an e-commerce store, or creating a professional portfolio, a reliable web hosting service is the foundation of your success. Hostinger, a popular web hosting provider, has carved a niche for itself by offering budget-friendly hosting plans with a user-friendly interface. But is Hostinger all it’s cracked up to be? This comprehensive review dives deep into Hostinger’s features, performance, pricing, customer support, and more to help you decide if it’s the right fit for your website.I’d be glad to provide a comprehensive guide on migrating your website to Hostinger using their free migration service:
before we start lets get some benefit for hostinger
Understanding Web Hosting: A Primer
Before delving into Hostinger’s specifics, let’s establish a basic understanding of web hosting. Imagine your website as a house. The website files (code, images, text) are the furniture and décor, and the domain name is the address. Web hosting providers own and maintain large warehouses filled with servers – powerful computers that store your website files and make them accessible to visitors through the internet. When someone types your domain name into their browser, their computer connects to the server where your website resides, retrieves the files, and displays your website on their screen.
Hostinger’s Offerings: A Diverse Hosting Portfolio
Hostinger caters to a range of website needs by offering various hosting plans. Here’s a breakdown of their main offerings:
- Shared Hosting: The most affordable option, suitable for beginners and small websites. Multiple websites share resources on the same server, making it cost-effective.
- Cloud Hosting: Offers better performance and scalability than shared hosting, ideal for growing websites that experience traffic fluctuations. Resources are allocated dynamically based on your website’s needs.
- VPS Hosting: Provides dedicated resources on a virtual server, offering greater control and security than shared hosting. Ideal for websites with consistent traffic or requiring customization.
- WordPress Hosting: Tailored specifically for WordPress websites, includes features like pre-installed WordPress, automatic updates, and enhanced security.
- eCommerce Hosting: Optimized for online stores, offering features like shopping cart integrations, SSL certificates for secure transactions, and increased processing power.
- Minecraft Server Hosting: A specialized service for hosting Minecraft servers, ensuring smooth gameplay for your friends or community.
35% OFF
Deal

A Spotlight on Shared Hosting: Hostinger’s Bread and Butter
Shared hosting is Hostinger’s most popular offering, and for good reason. It’s incredibly affordable, making it an attractive option for individuals and small businesses starting their online journey. Here’s a closer look at the features and functionalities of Hostinger’s shared hosting plans:
- Multiple Plans: Hostinger offers several shared hosting plans, from the basic Single Shared Hosting to the feature-rich Business Shared Hosting. Each plan caters to different website traffic volumes and resource requirements.
- Ease of Use: Hostinger is known for its user-friendly hPanel control panel. It’s intuitive and well-designed, allowing even beginners to manage their websites with ease.
- Free SSL Certificates: Security is paramount. All Hostinger shared hosting plans come with free Let’s Encrypt SSL certificates, ensuring secure communication between your website and visitors’ browsers.
- Website Builder: Hostinger’s drag-and-drop website builder (powered by Zyro) makes creating a website a breeze, even for those with no coding experience. Choose from a variety of pre-designed templates and customize them to match your brand.
- Email Accounts: Each shared hosting plan includes a set number of email accounts, allowing you to create professional email addresses associated with your domain name.
- Automatic Backups: Hostinger offers weekly automatic backups on the Single and Premium Shared Hosting plans, and daily backups on the Business Shared Hosting plan. This safeguards your website data in case of unexpected events.
- Performance Optimization: Hostinger utilizes LiteSpeed caching technology and strategically located data centers to deliver fast website loading times for your visitors.
Beyond Shared Hosting: Exploring Hostinger’s Other Options
While shared hosting is a solid choice for beginners, Hostinger’s cloud, VPS, and WordPress hosting plans cater to those with more specific needs.
- Cloud Hosting: Ideal for websites experiencing traffic spikes or requiring greater flexibility. Cloud hosting automatically scales resources up or down based on your website’s demands, ensuring optimal performance at all times.
- VPS Hosting: Offers dedicated resources and increased control over your server environment, suitable for websites with high traffic volume or requiring advanced customization.
- WordPress Hosting: Streamlines the WordPress hosting experience with features like automatic updates, enhanced security measures, and pre-installed plugins to optimize your website’s performance.
I’d be glad to provide a comprehensive guide on migrating your website to Hostinger using their free migration service:
Prerequisites:
- Access to your current website’s hosting control panel (cPanel, Plesk, etc.)
- Login credentials for your Hostinger account (if you don’t have one, create a free account first)
Steps:
-
Back Up Your Website (Optional but Highly Recommended):
- Even though Hostinger offers a free migration service, it’s always a good practice to have your own backup in case of unforeseen circumstances.
- Use your current hosting provider’s tools or a plugin (if it’s a WordPress site) to create a complete backup of your website files and database.
- Download the backup and store it securely on your local computer or a cloud storage service.
-
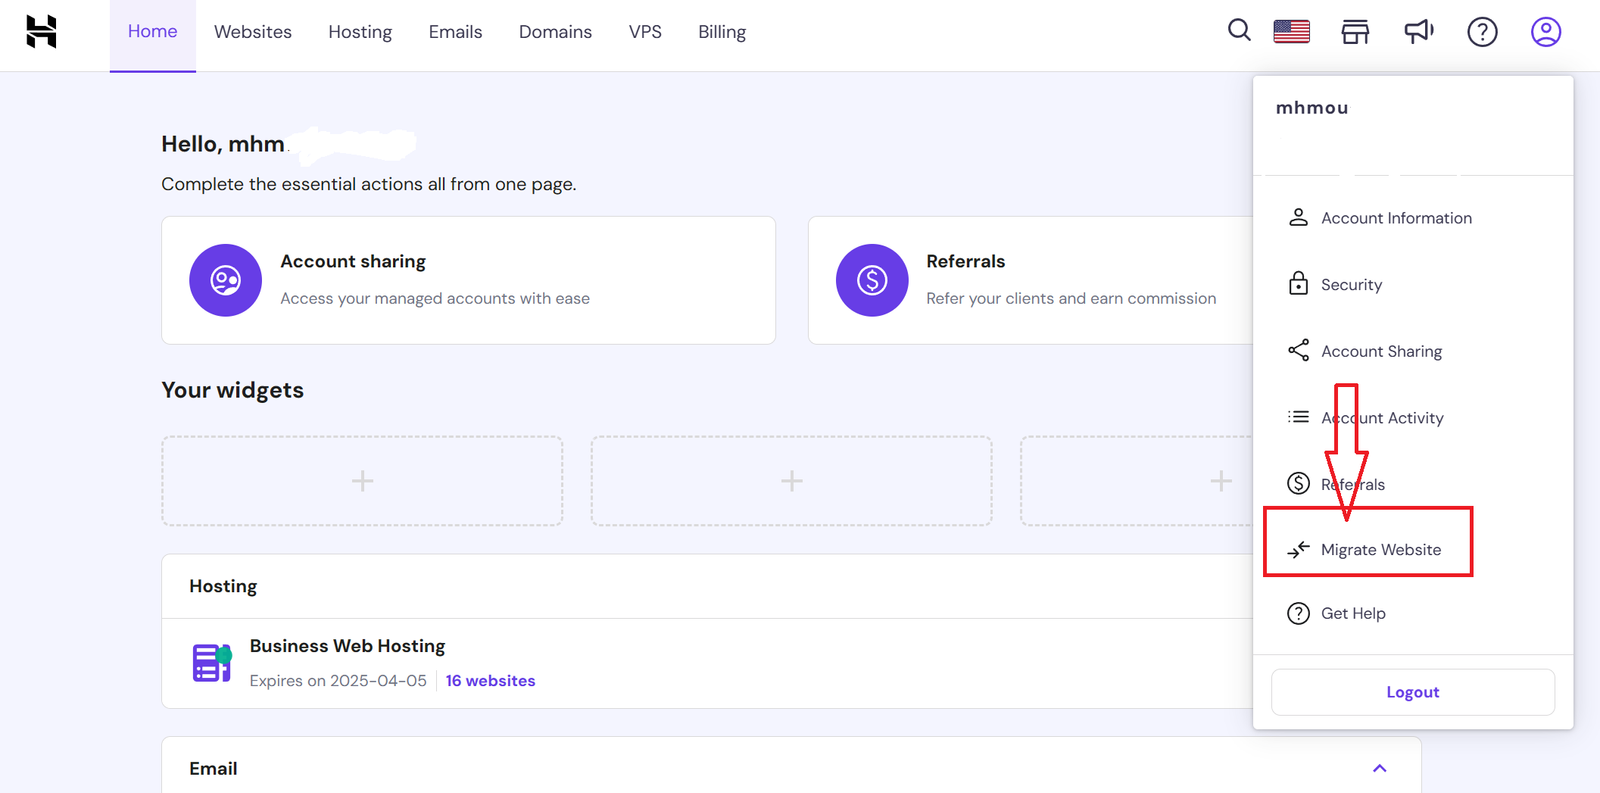
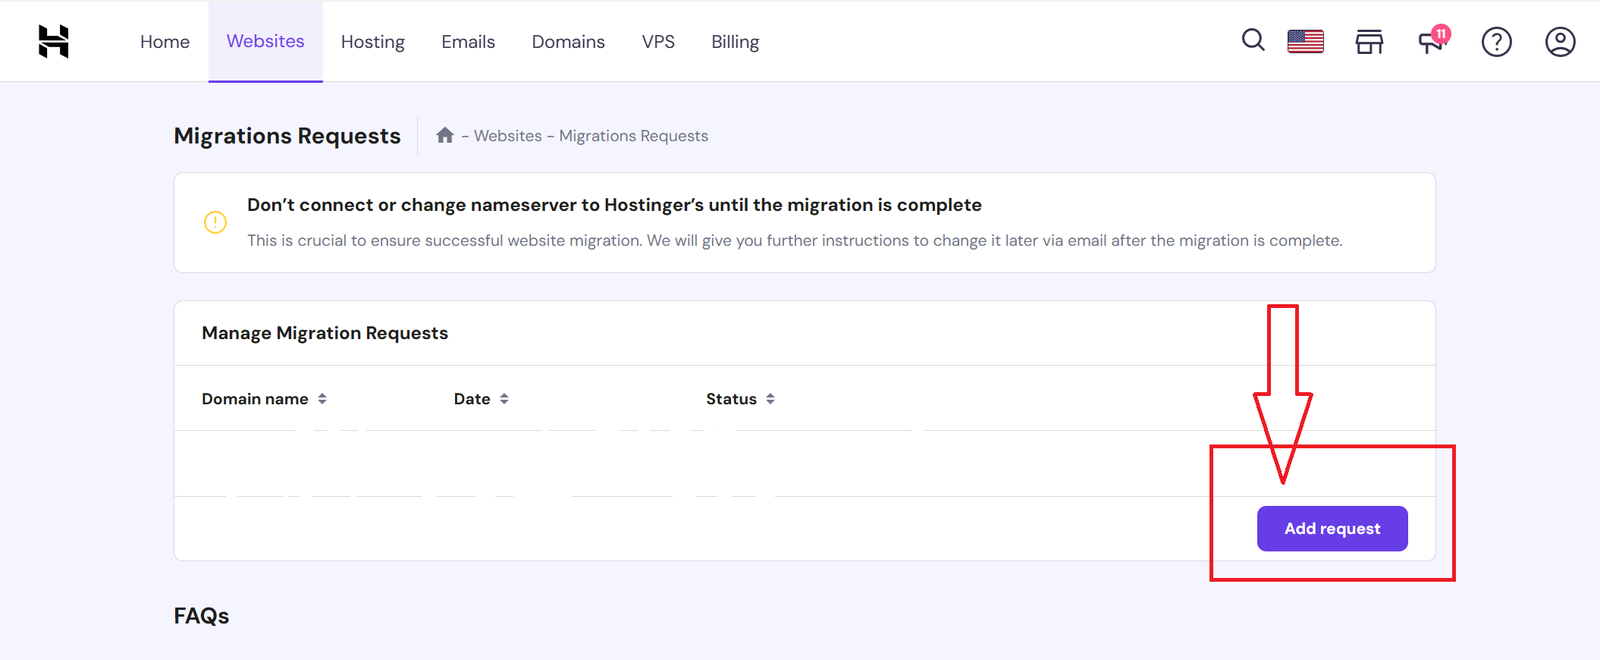
Initiate the Migration Request in Hostinger:
- Log in to your Hostinger account.
- Navigate to the “Websites” section in your control panel.
- Look for an option like “Add Website” or “Migrate Website” (the exact wording might vary).
- Choose “Migrate Website” to proceed with the free migration service.
-
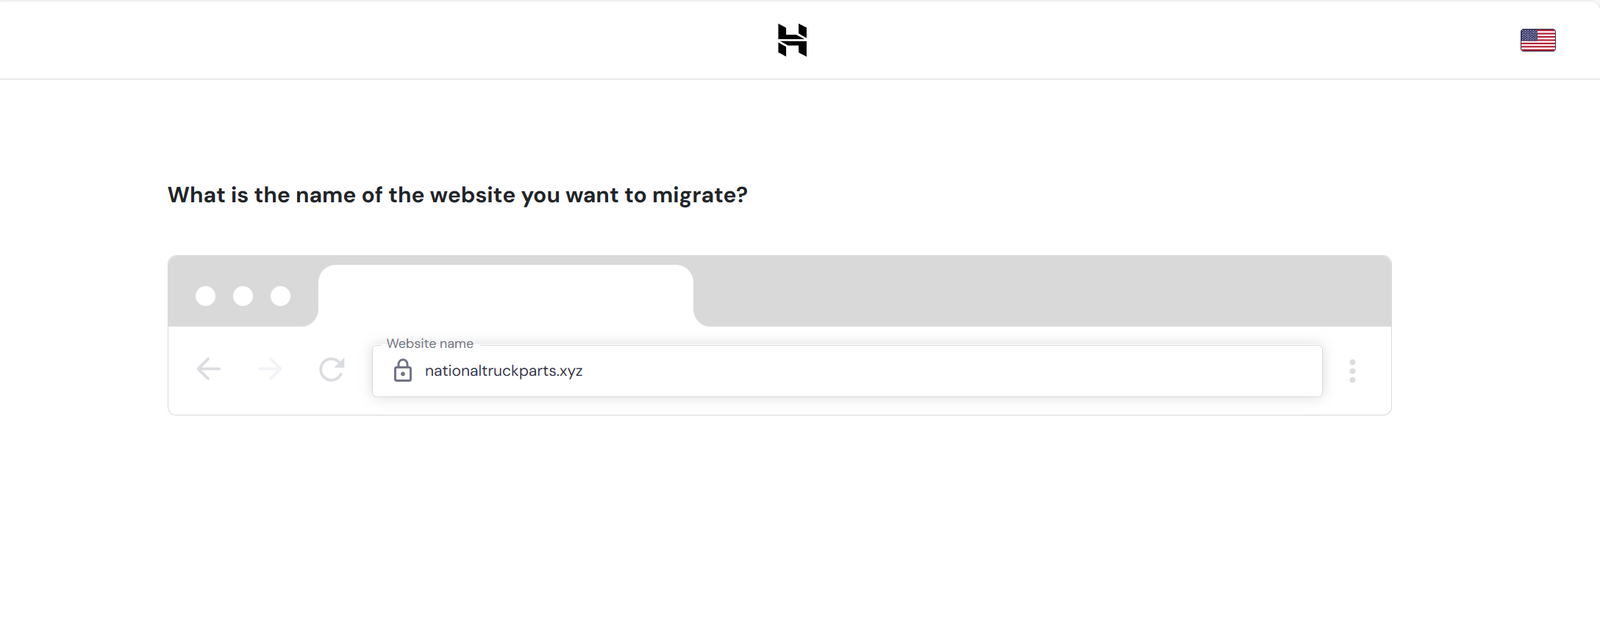
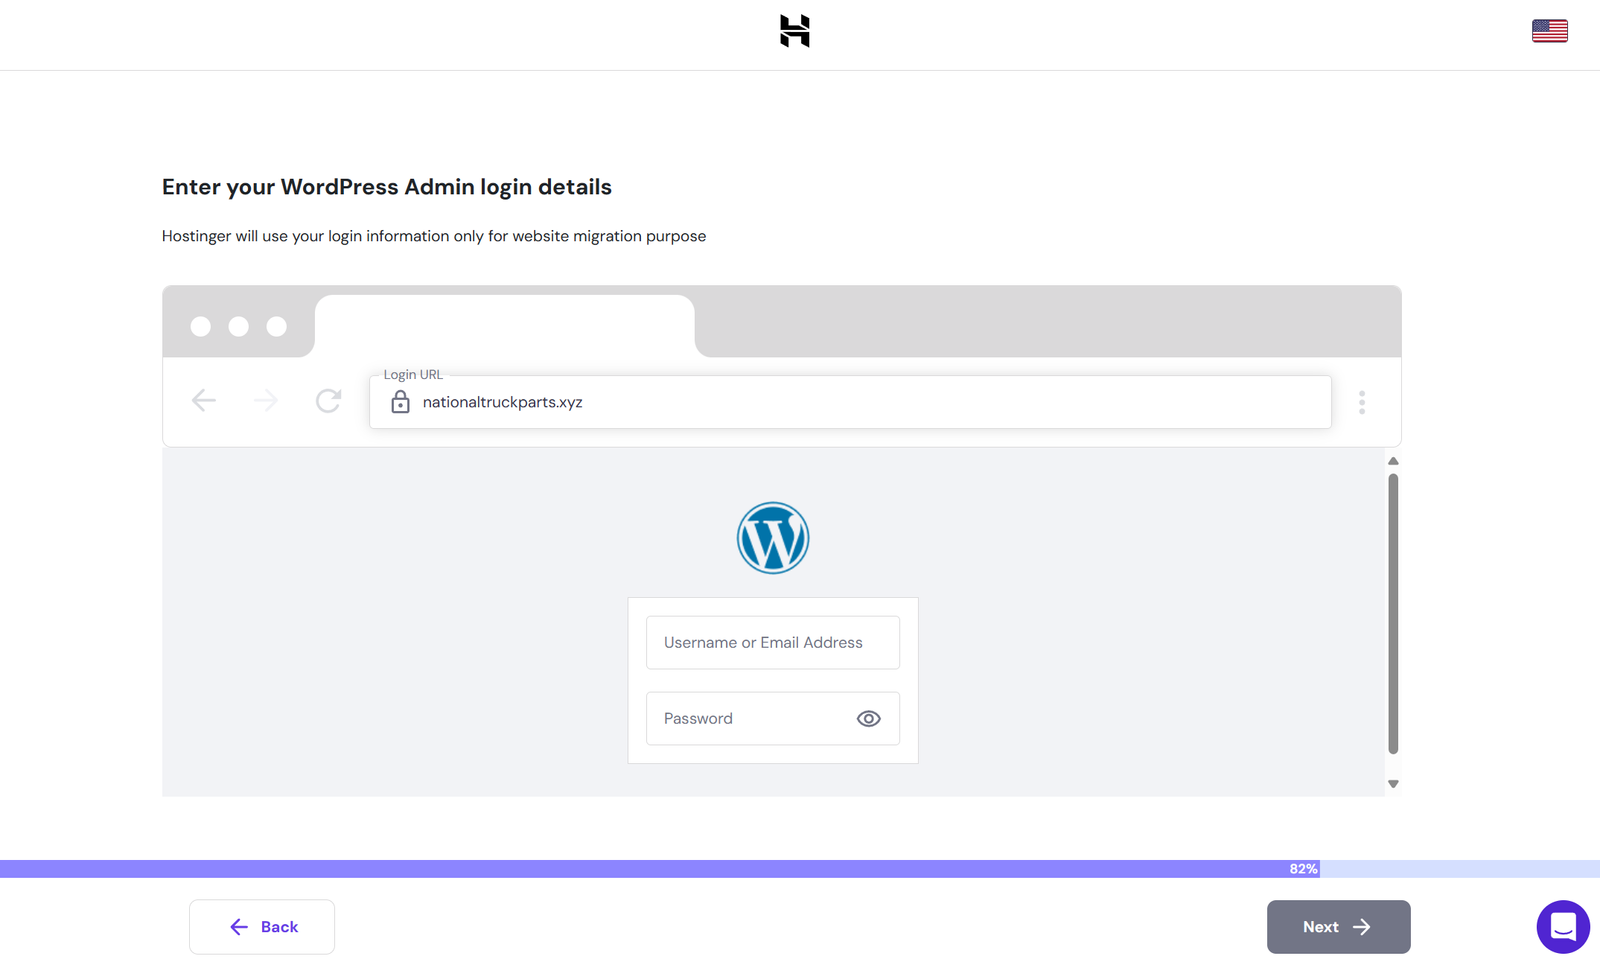
Provide Details About Your Website:
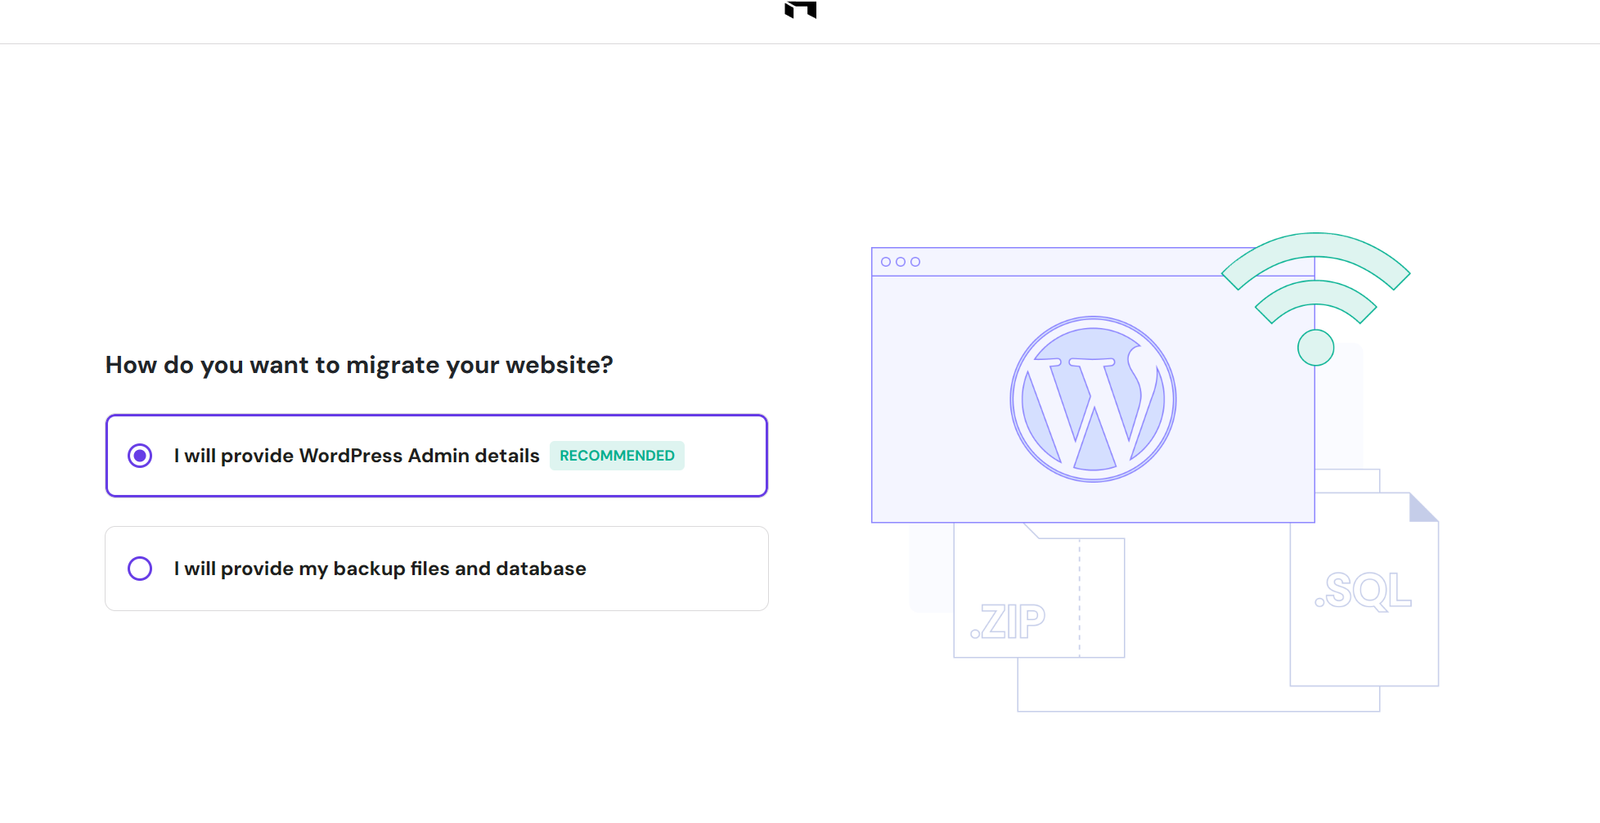
- Hostinger will offer two options for migration:
- I will provide WordPress Admin details: Select this if your website is built with WordPress and you can grant Hostinger temporary access to your WordPress admin panel to facilitate the migration.
- I will upload my website’s files: Choose this option if your website is not on WordPress, or if you don’t feel comfortable sharing admin access. You’ll need to upload a compressed archive (ZIP format) of your website files and a separate SQL file for your database backup.
- For the WordPress Admin option:
- Enter your website’s current URL (domain name).
- Provide your WordPress admin username and password.
- Important: Confirm that you won’t change your domain name’s DNS settings until the migration is complete. Modifying DNS settings prematurely can cause your website to become inaccessible.
- For the upload option:
- Have your compressed website files and database backup file readily available.
- Select the destination website in Hostinger where you want the migrated files to be placed (you can create a new website if needed).
- Upload both the website files (.zip) and database backup (.sql) using the provided interface.
- Hostinger will offer two options for migration:
-
Review and Submit the Request:
- Carefully review the migration details to ensure everything is correct, including your website URL, database information (if applicable), and destination directory in Hostinger.
- Once you’re confident, click the “Submit Request” button to initiate the migration process.
-
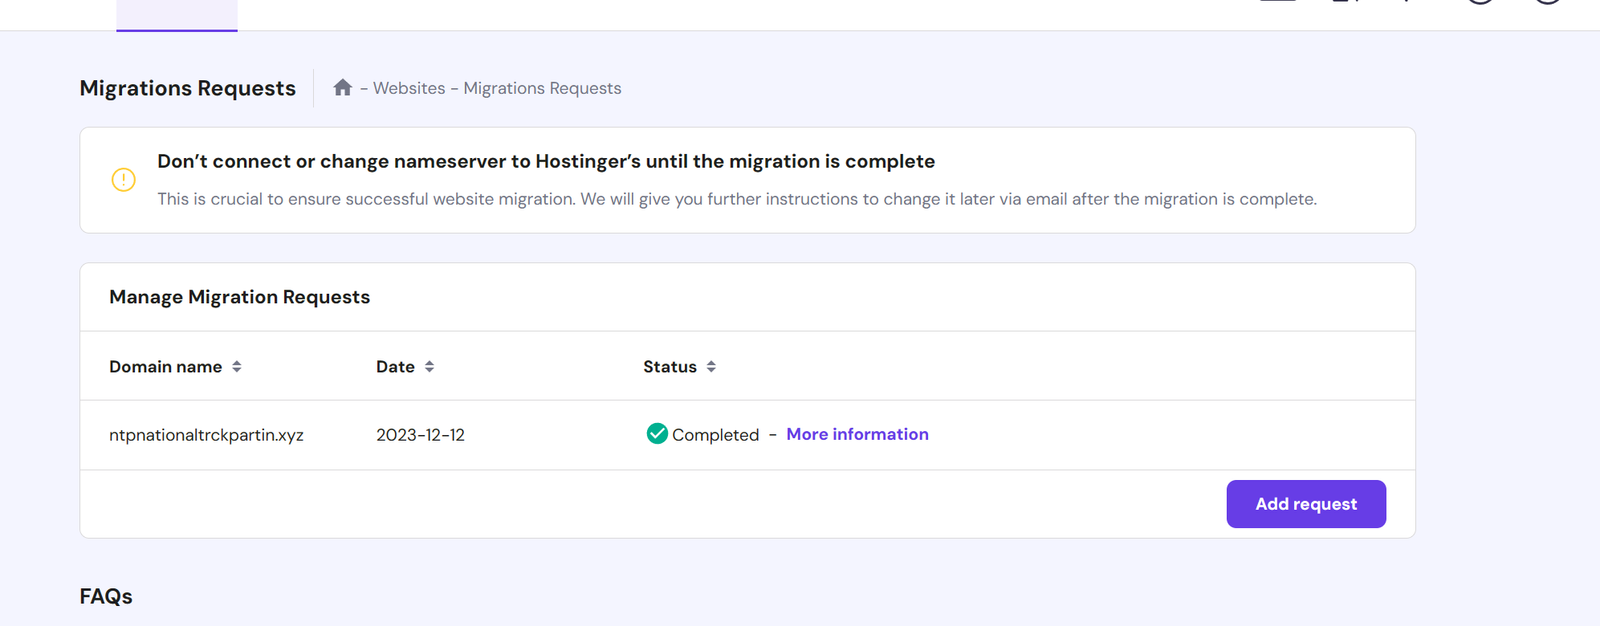
Monitor the Migration Progress:
- Hostinger will typically take 24-48 hours to complete the migration. You’ll receive updates on the status via email or notifications within your Hostinger account.
-
Test and Point Your Domain (Optional):
- If you migrated your website without changing your domain name, you might not need to take any further action. Hostinger will likely handle the necessary configuration on their end.
- However, if you’re migrating to a new domain name hosted on Hostinger, you’ll need to update your domain’s DNS settings to point to your new Hostinger server. This process typically involves logging in to your domain registrar’s control panel and modifying the A records to reflect Hostinger’s nameservers.
-
Verify Functionality:
- Once the migration is complete, thoroughly test your website on Hostinger to ensure everything is functioning as expected. Check all pages, forms, links, images, and other elements to make sure they’re working correctly.
Additional Tips:
- If you encounter any issues during the migration process, don’t hesitate to contact Hostinger’s support team. They’re usually available 24/7 via live chat or email.
- Consider clearing your browser’s cache after the migration to ensure you’re viewing the most recent version of your website files on Hostinger.
- If you created a local backup in step 1, keep it readily available for future reference or in case you need to restore your website.
By following these steps and keeping these tips in mind, you should be able to successfully migrate your website to Hostinger using their free migration service.
Comments are closed